Here is a collection of tutorials on Anki. Watch these videos or follow the step by step instructions that follow them (and then browse around the Gallery pages and use those step-by-step tutorials):
Here is a collection of tutorials on Anki.
Tutorial 1: Getting it installed and making your first flashcards
Tutorial 2: Installing the Model Deck
Tutorial 3: Learning Simple Spellings and Sounds with the Model Deck
Tutorial 4: Learning Simple Words with the Model Deck
Tutorial 5: Getting it synchronized across your various devices (Laptops, smartphones, etc.)
Installation
- Head over to http://ankisrs.net, click the download button and follow the instructions on that page. If you’re still struggling with Anki installation, then join and ask the Anki language community or look at the resources at this Anki language learning website.
- Done!
Creating Flashcards with images and sound files
- Open up the program
- On the top of the window, you’ll see three buttons. Click the “Add” button.
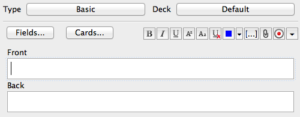
- You’ll see a window that looks like this:
For now, all I want you to be able to do is put text, images and sound files into your flashcards. We’ll talk about card types a little later, in The Gallery, but all we need for the moment is the “Basic” card type, which is already selected:
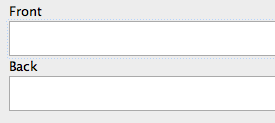
The Basic card type has two fields: Front and Back, basically corresponding to the front and back side of a flashcard:
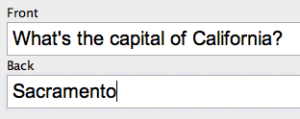
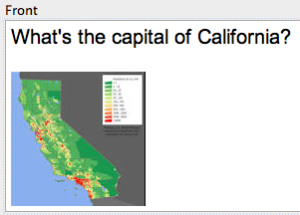
If you click in those boxes, you can type in them. If we were going to make a flashcard asking about the capital of, say, California, we could do this:
Then, if you wanted, you could click “Add” on the bottom of the window and make a flashcard. But before we do, let’s add a picture.
- Adding a picture
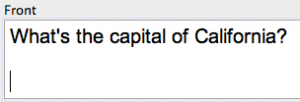
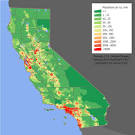
Click somewhere after the question mark in “What’s the capital of California?” and hit return twice. You’ll see this:Now let’s stick a photo of California into this flashcard. Use this one:
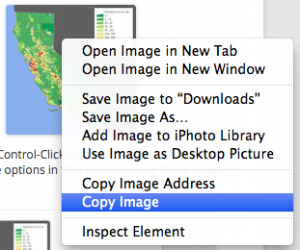
Right click (Macs: Control-Click) on the photo. A menu will pop up, and one of the options in that menu will be “Copy image.” Choose it.
Now go back to Anki. I highly recommend learning to use keyboard shortcuts for this, because it’ll make flashcard creation faster in the long run. Press Alt-Tab (Mac: Command-Tab) to switch back to Anki.Click once where you want your picture to go, and you’ll see a blinking cursor:
Now paste the image. You can either right click (Mac: ctrl-click) there and select “Paste,” or press control-V (Mac: Command-V). I prefer the keyboard shortcuts – they’re faster. If you see this:
You’ve successfully added an image.
- Adding a sound file
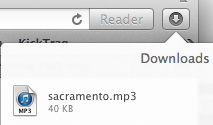
Just for fun, and to teach you how to play with sound files when it’s actually useful to do so, we’re going to make this flashcard say “Sacramento” whenever you look at the back side of the card. Here’s a recording of Arnold Schwarzenegger saying “Sacramento”. Download it.This works differently with different computer and browser setups (on a Mac, you can usually Option+Click on the link), but a relatively foolproof way to start the download is to right-click (Macs: Ctrl-Click) on the link and select “Download linked file”/”Save link as..”/etc. Next, you’re going to need to drag that file into the box that says “Sacramento” on your flashcard in Anki. The easiest way to do that will depend upon your browser. I’ll show you how to do it in Chrome, Safari and Firefox.In Chrome, the file will show up in a little box on the bottom left. It looks like this:In Firefox, you’ll see a little downward-facing arrow on the top right. Click it, and you’ll see a little window pop up that looks like this:
In Safari, you’ll also need to click on that downward-facing arrow on the top right of your window. It’ll open up a similar little window that looks like this:
The next steps are the same for all three browsers
- Click and drag the sound file (move your mouse onto the picture of the document, not the text, then click and move your mouse to pick up the file). Once you’re holding that sound file in your mouse, don’t let go of it.
- You’re going to need to drag that sound file into the “Sacramento” box in Anki. If you can see that box right now, you’re going to have an easy time, but for most people with smaller screens, you probably can’t see that box (the browser window is covering up the program). For you, you’ll need to switch into the program using your keyboard. Without letting go of the mouse, press and hold the Alt (Mac: Command) key. While holding that key, press the “Tab” key. You’ll see a screen come up that shows you all your open applications. Keep pressing Tab until the selected application is Anki (on PCs, you’ll need to select the Anki window with a Plus sign in it. On Macs, that’ll just be the rectangle with the blue star that says “Anki” underneath). Once you’re there, let go of the Alt (Macs: Command) key to switch into Anki.Then drag the audio file onto the far right side of the “Sacramento” box and let go of the mouse button. If you dropped it in the right place (make sure your mouse pointer is inside the box, you’ll see this:
If you see that, then it has successfully imported the sound file into your flashcard deck. You’re done. Add the flashcard (if you wish) by clicking the “Add” button on the bottom left of the window.
This gets a lot easier with practice. Those three skills – adding text, adding pictures and adding sound files into Anki’s input boxes – are the primary computer skills you need to get it working. I want you to have those mastered in advance, long before messing around with language learning, so when you actually get to learning words and grammar, you can focus on the language, rather than stressing out about computer issues.
If you want to save yourself ~30-60 minutes of time making your first Anki flashcards, then check out our shop which has a number of resources you can use to speed up the process. There are also other ready-to-use Anki flashcard decks in various languages that you can check out. Again, if you need to ask questions about making Anki flashcards, go to the Anki Language Learning Reddit Forum or check out the resources from this Anki language blog. Don’t forget that we also have our Fluent Forever mobile app, which doesn’t use Anki, but can be way faster.
Try the Fluent Forever App
By the way, did you know the book is now an app. Check out our Fluent Forever app!
Discover our immersive method rooted in neuroscience designed to take you to fluency in < 30 minutes a day through four steps:
- 1. Train your ears with pronunciation lessons.
- 2. Learn vocabulary through images instead of translations.
- 3. Learn grammar naturally through stories relevant to you.
- 4. Practice your speech to fluency with native tutors.
Check out our Fluent Forever app!


